Nordic walking’s true cardiovascular benefit isn’t from the poles themselves, but from mastering the propulsion technique that transforms a stroll into a full-body engine.
- Engaging the upper body correctly can increase calorie burn by up to 46% compared to regular walking.
- Proper pole height and material (like carbon fiber) are crucial for preventing shoulder pain and protecting arthritic joints.
Recommendation: Focus on the « push » not the « plant. » Your goal is to propel yourself forward with each arm swing, not just use the poles for balance.
You love your daily walk, but you can’t shake the feeling that you could be getting more out of it. You see people striding purposefully with those walking poles and wonder: is it really making a difference, or is it just another gadget? Many people assume Nordic walking is simply ‘walking with poles for balance.’ They’ve heard it’s a ‘full-body workout’ that ‘burns more calories,’ but the advice often stops there, leaving the most important part unexplained.
But here’s the secret the most effective Nordic walkers know: the poles aren’t for support, they’re for propulsion. The real magic for your heart happens when you stop using them as crutches and start using them as engines. This isn’t just walking; it’s a technical sport, and your results are directly tied to your form. The difference between passively dragging your poles and actively propelling yourself forward is the difference between a light stroll and a powerful, heart-strengthening workout.
In this guide, we’ll break down the essential techniques—from the proper arm swing to choosing the right gear—that will transform your walk and turn every step into a powerful boost for your cardiovascular health. We’ll show you how to engage the right muscles, measure your intensity without complex gadgets, and make smart choices about equipment that protect your joints. Get ready to turn your daily walk into your new favorite sport.
This article dives into the specific techniques that unlock the full cardiovascular potential of Nordic walking. We’ll cover everything from fundamental mistakes to advanced gear choices, giving you a complete roadmap to a more effective workout.
Summary: Your Guide to a More Effective Nordic Walking Workout
- Why Dragging Your Poles Is the Rookie Mistake That Ruins the Workout
- Walking vs Nordic Walking: How to Burn 46% More Calories in the Same Time?
- How to Engage Your Lats and Triceps While Walking the Dog?
- Why Joining a Nordic Walking Group Beats Solo Training for Motivation?
- Pavement or Grass: Where Should You Plant Your Tips for Safety?
- The « Talk Test »: How to Train Your Heart Without Gasping for Air?
- The Elbow Angle Rule: How to Set Your Pole Height to Avoid Shoulder Pain?
- Carbon or Aluminium: Which Walking Pole Protects Arthritic Wrists Best?
Why Dragging Your Poles Is the Rookie Mistake That Ruins the Workout
Alright team, let’s tackle the number one mistake I see on the trails. It’s that gentle ‘click-drag… click-drag’ sound. Dragging your poles is like driving with the handbrake on; you’re moving, but you’re wasting all the power. The purpose of the poles is not to simply tap the ground for balance. Their true function is active propulsion. You should be planting the pole tip behind you and actively pushing the ground away, using your arm and upper body strength to propel your body forward. This is the fundamental switch you need to flip in your mind: from ‘supporting’ to ‘pushing’.
When you drag the poles, you’re only getting the benefits of regular walking. But when you start to push, you engage your triceps, lats, and core muscles. This transforms the walk into a genuine full-body workout. The effort to push off with your arms forces your heart to work harder to supply oxygen to both your upper and lower body simultaneously. This isn’t just a feeling; scientific evidence shows that this active technique is what triggers the enhanced cardiovascular benefits. In fact, research demonstrates that proper Nordic walking technique results in significantly higher oxygen consumption compared to walking without poles or with improper, passive technique.
Think of it this way: each push is a small, controlled press that adds power to your stride. It creates a rhythmic cadence that makes you feel more powerful and coordinated. The moment you feel that forward thrust from your arms, you’ll know you’ve unlocked the secret. Stop dragging and start pushing—your heart will thank you for it.
Walking vs Nordic Walking: How to Burn 46% More Calories in the Same Time?
This is the big question, isn’t it? The numbers you see—20%, 30%, even 46% more calories burned—sound amazing, but where do they come from? The answer lies in one word: engagement. Regular walking is a fantastic lower-body exercise. But by adding proper Nordic walking technique, you recruit the vast, powerful muscles of your upper body. We’re talking about your latissimus dorsi (your large back muscles), your triceps, your shoulders, and your core. Suddenly, you’re not just moving your legs; you’re coordinating an army of muscles working in harmony.
This total-body engagement demands more energy. Your heart has to pump more oxygen-rich blood to fuel not just your legs, but your arms, back, and core as well. This increased metabolic demand is what torches the extra calories. However, that « up to 46% » figure comes with a crucial condition: technique. You don’t get that bonus by simply carrying the poles. You get it by actively using them to propel yourself forward, as we discussed. The harder you push, the more muscles you engage, and the higher your calorie burn.
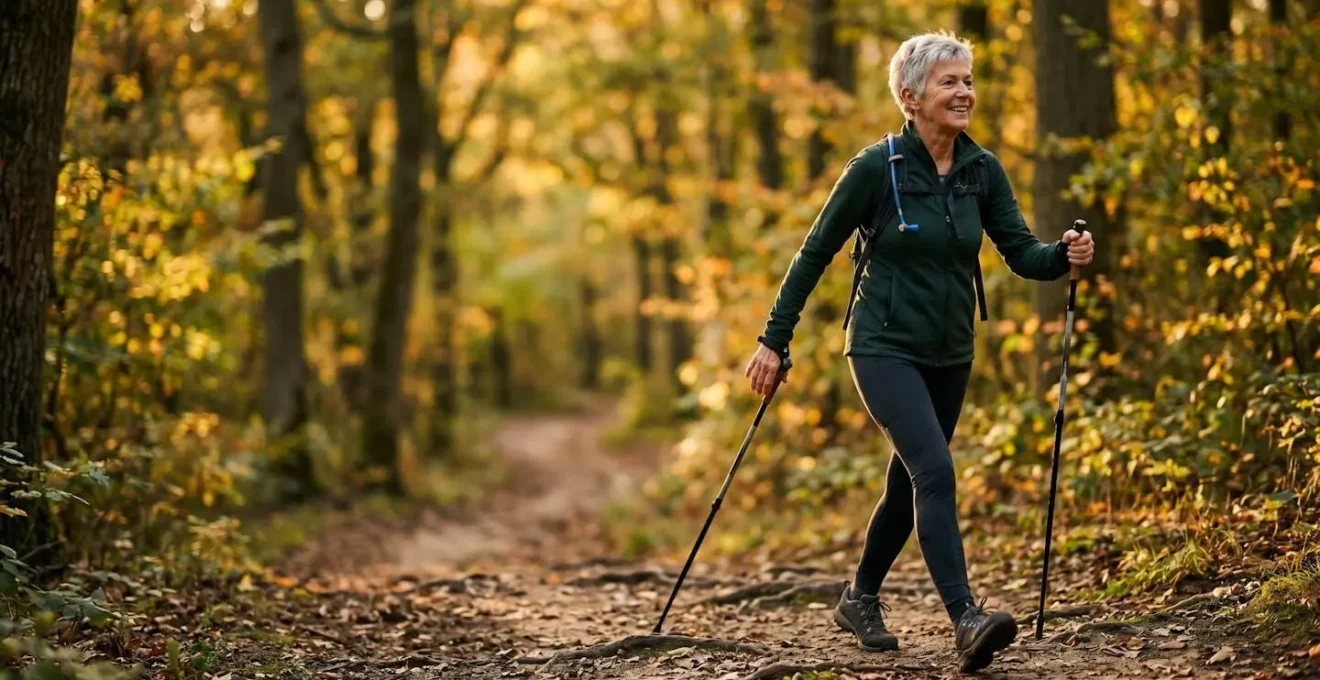
The image below shows the kind of muscle activation we’re aiming for. It’s not about a death grip on the pole, but a powerful, fluid push that starts from your shoulder and extends through your arm.
This is why the results can vary so much. Someone with lazy form might only see a 10-15% increase. But a walker with powerful, precise technique can absolutely reach those higher numbers. According to research from the Cooper Institute, the benefit can range from an average of 17-21% to a staggering maximum of up to 46% increase in calorie burn, depending entirely on your intensity and form. The power to maximize your workout is literally in your hands.
How to Engage Your Lats and Triceps While Walking the Dog?
Okay, this is the ultimate real-world test of your Nordic walking skills! How do you maintain good form and get an upper-body workout when you have a leash in one hand and a dog with its own agenda? It seems impossible, but with a slight modification, you can absolutely do it. The key is to embrace the « one-pole workout ». You’ll hold the leash in one hand and your Nordic pole in the other. This isn’t just a compromise; it’s a fantastic exercise for core stability and unilateral strength.
Your goal is to replicate the proper push-off motion with your single pole. You’ll still plant the pole behind you, engage your core, and push off firmly. You might be surprised at how much you feel this in your obliques as your body works to stay balanced and straight without a pole on the other side. The leash hand, meanwhile, is busy managing your furry friend, but it’s also acting as a counterbalance. When your dog pulls, you’ll naturally engage your lats and core to maintain your posture, turning a potential nuisance into a core-strengthening opportunity.
Even with frequent stops and starts, you can keep the workout going. During a pause, practice short, sharp push-offs. While walking, focus on a powerful, deliberate propulsion with your pole arm. It requires focus, but it’s a great way to sneak in a quality workout during your daily dog-walking duties. Here is your plan to make it happen.
Your Action Plan: Mastering the One-Pole Dog Walk
- One-Pole Setup: Use one pole in your dominant hand while holding the leash in the other for stability and balance support. Alternate hands on different walks to ensure balanced muscle development.
- Create an Anchor: Plant the pole at an angle behind you to create a stabilizing ‘anchor point.’ Consciously engage your core muscles with each plant to prevent twisting.
- Maintain Propulsion: Execute short, powerful push-offs even during stop-and-go moments. This maintains upper body engagement and keeps your heart rate in the target zone.
- Counterbalance Control: Use the pole as a dynamic counterbalance when your dog pulls. Actively engage your lats and triceps to maintain postural stability instead of just letting your arm be pulled.
- Focus on Active Push: Continually focus on active pole propulsion rather than passive dragging. This is the key to keeping your heart rate up and turning the dog walk into a cardiovascular session.
Why Joining a Nordic Walking Group Beats Solo Training for Motivation?
Walking solo can be a meditative and wonderful experience. But when it comes to long-term commitment and pushing your performance, there’s nothing quite like the power of the pack. Joining a Nordic walking group taps into some of our most basic human motivators: social connection, accountability, and a little friendly competition. When you know a group of people is expecting you at 8 AM on a Saturday, you’re far less likely to hit the snooze button. That’s accountability in action.
Beyond just showing up, the group dynamic enhances the workout itself. You’ll naturally walk a little faster to keep up with the person in front of you. You’ll push a little harder seeing the great form of a more experienced walker. An instructor or group leader can offer immediate feedback on your technique—something you can’t get when you’re on your own. This shared experience creates a positive feedback loop: you learn from others, you improve your technique, you see better results, and your motivation soars.
The social aspect cannot be overstated, especially for retirees. It turns exercise from a solitary chore into a fun social event. The conversations on the trail, the coffee afterwards, the shared sense of accomplishment—these are powerful rewards that keep you coming back. And science backs this up. The sense of belonging and the psycho-social benefits are key drivers of adherence. In fact, research on community-based group exercise programs shows a remarkable adherence rate, with many participants sticking with their programs long-term precisely because of these social features.
Pavement or Grass: Where Should You Plant Your Tips for Safety?
This is a fantastic technical question that most new walkers don’t even think to ask! But it’s crucial for both safety and performance. Your poles come with two primary types of tips for a reason: hard surfaces and soft surfaces demand different tools. Using the wrong tip isn’t just inefficient; it can be dangerous or cause unnecessary strain on your joints. Think of it like choosing the right tires for your car—you wouldn’t use slicks in the snow.
For hard, unforgiving surfaces like pavement, asphalt, and concrete, you must use the rubber tips, often called ‘paws’. Their job is twofold. First, they provide a surprising amount of grip on smooth surfaces. Second, and more importantly for seniors, they act as crucial shock absorbers. They dampen the high-frequency vibrations that travel up the pole shaft with every ‘plant’, protecting your wrist, elbow, and shoulder joints from repetitive impact.
Conversely, when you move onto soft surfaces like grass, dirt trails, or even snow, the rubber paws become a liability. They can slip and offer no purchase. This is where you remove the paws and expose the sharp, metal ‘spike’ tip underneath. This tungsten carbide tip is designed to dig into the ground, providing superior traction and preventing slips. It gives you a solid anchor point to push off from, maximizing your propulsion. Here’s a quick guide to making the right choice every time.
- Use rubber paws on pavement and concrete to absorb high-frequency vibrations and protect your wrist and elbow joints from impact shock.
- Switch to metal spikes on grass, trails, or uneven terrain for enhanced grip and proprioceptive feedback that improves your balance.
- Adjust your pole angle slightly when transitioning between surfaces—a steeper angle on pavement for grip, a more forward lean on trails for propulsion.
- Carry both tip types with you on walks that cover mixed terrain and don’t be afraid to stop and switch them.
- Inspect your tips regularly for wear. Worn rubber paws lose their shock-absorbing quality, and dull metal tips compromise your traction.
The « Talk Test »: How to Train Your Heart Without Gasping for Air?
In our world of high-tech watches and heart rate monitors, I’m going to let you in on an instructor’s secret: the most reliable and practical tool for measuring your workout intensity is your own voice. This is the ‘Talk Test,’ and it’s a beautifully simple way to ensure you’re in that perfect moderate-intensity zone for cardiovascular benefit, without pushing yourself into an unsafe anaerobic state. It’s especially valuable for seniors, particularly those on heart medications like beta-blockers, which can make heart rate monitors inaccurate.
Here’s how it works. While you’re Nordic walking at a consistent pace, try to speak a full sentence or count aloud. The ease with which you can do this tells you everything you need to know about your exertion level. If you can easily sing a song or chat effortlessly without taking a breath, I hate to break it to you, but you’re not working hard enough! It’s a sign that you need to increase your intensity by pushing off more powerfully with your arms.
The sweet spot you’re looking for is the ability to talk, but not sing. You should be able to carry on a conversation, but someone listening would be able to hear that you are exercising. If you can only get out one or two words at a time and are gasping for air, you’ve gone too far. You need to slow down and reduce your intensity. This simple biofeedback method is more attuned to your body’s real-time state than any device. Here is a more structured way to apply it.
- Count to 30 out loud. If you can do it comfortably on a single breath, you should increase your intensity by engaging your arms more actively.
- If you need two breaths to count to 30, congratulations! You’re in the ideal moderate-intensity cardio zone for maximum heart benefits.
- If you require three or more breaths, you need to reduce your intensity. You may be in an unsafe anaerobic zone.
- Use the test as a technique diagnostic. If you can easily sing while Nordic walking, it’s a clear sign you’re not engaging your upper body enough. It’s time to focus on propulsion!
The Elbow Angle Rule: How to Set Your Pole Height to Avoid Shoulder Pain?
If there is one adjustment that can make or break your Nordic walking experience, it’s pole height. Get it wrong, and you risk shoulder strain, ineffective propulsion, and general discomfort. Get it right, and you unlock a fluid, powerful, and pain-free stride. The key is what I call the ‘Elbow Angle Rule.’ While the old advice was to set your poles to create a strict 90-degree angle at the elbow, modern technique favors a slightly more open angle of 100 to 110 degrees.
Why the change? This slightly longer pole length and more open angle facilitate a full arm swing. It encourages you to reach forward and, more importantly, to fully extend your arm behind you during the push-off phase. This full extension is where maximum power is generated, and it’s also a more natural and less stressful movement for the shoulder joint, reducing the risk of impingement. A 90-degree angle can feel restrictive and lead to a short, choppy arm motion.
The perfect pole height also changes with the terrain. Think of your poles as your transmission. You need to shift gears for hills! When walking uphill, you should shorten your poles by a few inches. This allows you to maintain a good posture and plant the poles effectively for power. When descending, you should lengthen them. This turns them into effective brakes, allowing you to lean back slightly and take a significant amount of strain off your knees. Proper pole height isn’t a ‘set it and forget it’ affair; it’s a dynamic adjustment for optimal biomechanics.
Dynamic Pole Height Adjustment Guide
Start with the standard advice—a 90-degree elbow angle—as your baseline. Now, open that angle to 100-110 degrees to facilitate a full arm swing and reduce the risk of shoulder impingement. When you encounter a hill, shorten your poles by 2-3 inches to maintain power transfer and proper posture. When going downhill, lengthen the poles by 2-3 inches to use them as brakes and reduce knee strain. Always test your height by planting the pole beside your foot; your elbow should form the target angle when you grip it comfortably. Finally, make a habit to re-evaluate your standard pole height every few months. As your strength, posture, and technique improve, your ideal height may change.
Key takeaways
- The true benefit of Nordic walking comes from active propulsion (pushing), not passive support (dragging).
- Use the simple « Talk Test » to ensure you’re in the right cardio zone for heart health without overexerting yourself.
- Your equipment matters: matching your pole tip to the terrain and choosing the right pole material can prevent injury and enhance your workout.
Carbon or Aluminium: Which Walking Pole Protects Arthritic Wrists Best?
We’ve talked technique, now let’s talk technology. The material your poles are made of might seem like a minor detail, but for a senior with sensitive or arthritic joints, it is one of the most important decisions you’ll make. The choice between aluminum and carbon fiber isn’t just about weight or price; it’s about vibration dampening, and this is where carbon fiber is the undisputed champion for joint protection.
Aluminum poles are durable and budget-friendly, which makes them a popular choice for beginners. However, aluminum is a metal that conducts vibrations very efficiently. Every time you plant your pole on a hard surface, a little shockwave of vibration travels up the pole shaft directly into your hand, wrist, and elbow. Over the course of a thousand steps, this can aggravate existing inflammation in arthritic joints. Carbon fiber, on the other hand, has natural vibration-dampening properties. As outdoor gear experts point out, » Carbon fiber is so incredibly strong, it doesn’t tend to vibrate much when you’re using poles made of it. » It absorbs those high-frequency jolts before they can reach your joints, resulting in a much smoother and more comfortable walking experience.
While carbon poles are a premium investment, think of them as a crucial piece of protective equipment. For a walker with arthritis, the extra cost is an investment in comfort, longevity, and the ability to walk further and more frequently without pain. When combined with a proper gauntlet-style strap system—which allows you to push off without tightly gripping the pole—high-quality carbon poles create the ultimate setup for protecting sensitive wrists.
This comparative analysis breaks down the key differences to help you make the best choice for your joints.
| Feature | Carbon Fiber | Aluminum |
|---|---|---|
| Vibration Dampening | Superior – absorbs high-frequency vibrations before reaching wrist joint | Conducts vibrations directly to wrist, potentially inflaming arthritis |
| Weight | 4-8 oz lighter per pair, reducing arm fatigue over long distances | 16-22 oz per pair, can increase joint stress during extended use |
| Grip System Priority | Best with gauntlet strap system for push-off without tight grip | Best with gauntlet strap system for push-off without tight grip |
| Flex Characteristic | Engineered flex acts as shock absorber on impact, gentler on joints | Rigid structure transmits impact force more directly |
| Durability | Can crack under lateral impact, less forgiving | Bends rather than breaks, more durable in rough conditions |
| Price | Premium investment ($100+) | Budget-friendly ($30-80) |
| Best For Arthritis | Recommended – superior vibration dampening reduces inflammation | Acceptable with proper grip system and shock-absorbing features |
The next step is yours to take. Grab your poles, find a clear path, and focus on that first powerful push-off. Your stronger heart is just a few strides away.