Chair yoga is not a compromise; it’s a sophisticated practice that uses the chair as a tool to unlock strength, stability, and deeper body awareness.
- Objective data shows chair yoga provides a light-to-moderate intensity workout, challenging the myth that it’s not « real » exercise.
- The practice focuses on biomechanical integrity and precision, leading to measurable gains in balance, strength, and lung capacity.
Recommendation: Instead of viewing the chair as a limitation, treat it as your first piece of yoga equipment to master the foundational principles of alignment and breath.
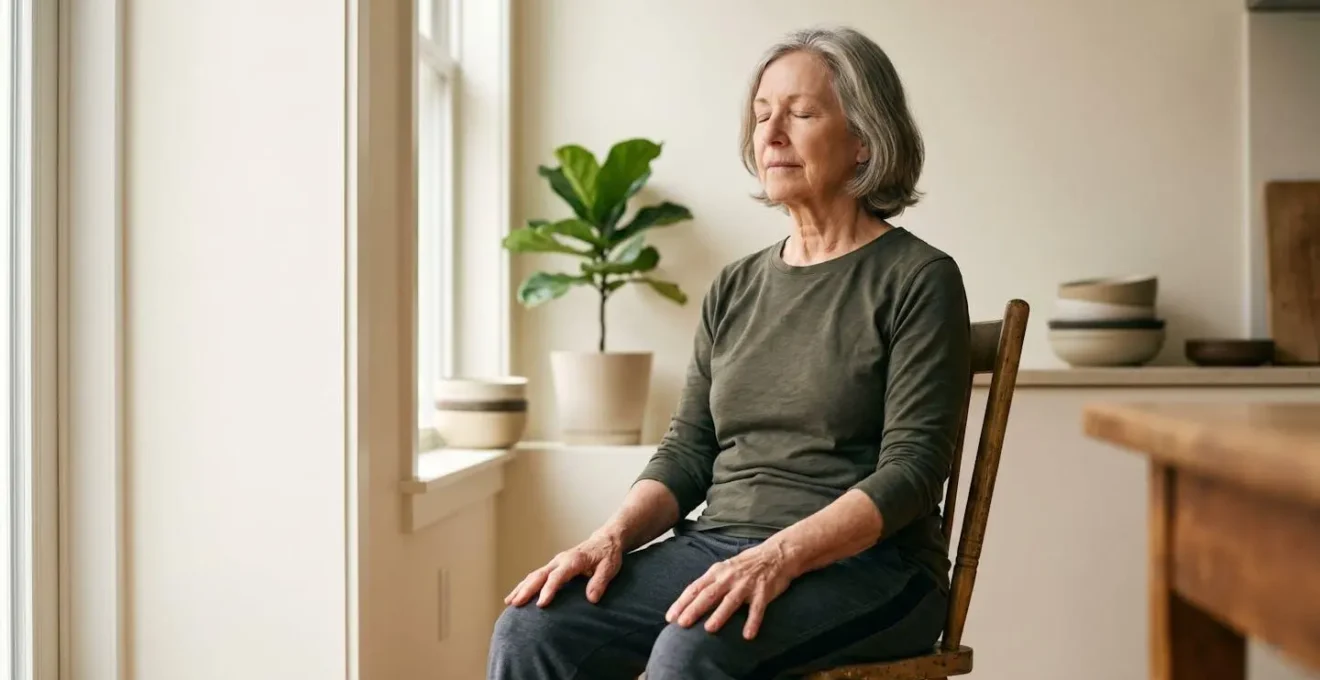
When joint pain whispers (or shouts) that getting down on the floor is no longer an option, the world of yoga can feel like a closed door. For many seniors, knee or hip issues create a barrier, and the suggestion of « chair yoga » can feel like a consolation prize—a watered-down version of the real thing. It’s often presented as a gentle, easy alternative, reinforcing the idea that it’s somehow lesser, a compromise for those who can no longer keep up.
But what if we’ve been looking at it all wrong? What if the chair isn’t a crutch, but a powerful apparatus? What if, instead of being a sign of limitation, the chair is a tool for precision, offering a unique form of proprioceptive feedback that allows for a deeper, safer exploration of yoga’s core principles? This isn’t about simply adapting a Sun Salutation; it’s about discovering a sophisticated practice that builds legitimate strength, enhances lung capacity, and cultivates a profound mind-body connection, all from a stable, secure base.
This guide will dismantle the « not real yoga » myth piece by piece. We will explore how specific, intentional movements can transform your health, from expanding your lungs with targeted breathing exercises to building real leg strength against a wall. Forget the idea of compromise. It’s time to discover how to get all the benefits of yoga, not just in spite of the chair, but because of it.
To navigate this deeper understanding of a powerful practice, this article explores the specific techniques and principles that make chair yoga a legitimate and effective discipline. Here is a look at the key areas we will cover.
Summary: How to Get the Benefits of a Sun Salutation Without Leaving Your Chair?
- Pranayama for COPD: How to Expand Lung Capacity While Seated?
- The Cat-Cow Chair Variation: How to Loosen a Stiff Spine Safely?
- Ankle Pumps and Rotations: How to Reduce Swelling While Watching TV?
- The « Not Real Yoga » Myth: Why Chair Yoga Is Still a Workout?
- Kitchen Chair or Sofa: Which Seat Is Safe for Your Practice?
- The 5-Minute Bed Routine to Unglue Stiff Hips Before Rising
- Blocks and Straps: Essential Tools or Crutches for the Weak?
- Warrior II with a Wall: How to Build Leg Strength Without Losing Balance?
Pranayama for COPD: How to Expand Lung Capacity While Seated?
The foundation of any yoga practice is the breath, or pranayama. For individuals with respiratory challenges like COPD, this is not just a spiritual concept but a vital tool for managing daily life. Seated practice offers a unique advantage: the stability of the chair allows you to isolate the muscles of respiration without the added work of maintaining posture. The goal is to move from shallow, panicked breathing to deep, intentional, and controlled breaths that maximize oxygen exchange.
A cornerstone of this practice is pursed-lip breathing. This technique isn’t just a folk remedy; it has a clear biomechanical benefit. By creating gentle back-pressure, it helps keep the airways open longer during exhalation. In fact, research published in StatPearls demonstrates that pursed-lip breathing creates a positive end-expiratory pressure (PEEP) that significantly improves oxygenation and can reduce the respiratory rate in patients with COPD. This simple act turns your exhale into a therapeutic tool.
Once you’re comfortable with this, you can progress to a more complete practice like Dirga Pranayama, or the Three-Part Breath. This involves consciously filling the belly, then the ribcage, then the upper chest, and exhaling in reverse. Using your hands to feel the expansion in each area provides powerful proprioceptive feedback, training your body to use its full lung capacity. This isn’t just « taking a deep breath »; it’s a systematic re-education of your breathing pattern, all possible from the safety and support of your chair.
The Cat-Cow Chair Variation: How to Loosen a Stiff Spine Safely?
Morning stiffness in the back is a familiar complaint, a feeling that the spine is « glued » together. The seated Cat-Cow pose is a gentle yet profound way to reintroduce movement and fluidity. The key is to move with intention and awareness, not momentum. The chair provides a stable pelvis, which is the anchor for all spinal movement, allowing you to focus purely on the articulation of each vertebra.
Instead of simply arching and rounding, think of the movement as a wave of spinal segmentation. As you inhale into Cow pose, begin the movement from your tailbone, tilting your pelvis forward and allowing the arch to travel sequentially up your spine—lumbar, thoracic, and finally cervical as you lift your gaze. This isn’t one big movement but a chain of smaller, connected actions. Placing your hands on your lower back can provide tactile feedback, helping you feel the muscles engage and the vertebrae shift.
On the exhale into Cat pose, reverse the wave. Tuck your chin first, allowing the rounding to ripple down through your upper, middle, and lower back until your pelvis tucks under. By moving slowly and sequentially, you encourage the flow of synovial fluid, which lubricates the facet joints between your vertebrae. You are not just stretching; you are methodically and safely mobilizing your entire spinal column, increasing circulation and easing the stiffness that can limit daily activities. This precision is the essence of a mindful yoga practice.
Ankle Pumps and Rotations: How to Reduce Swelling While Watching TV?
Swollen ankles and poor circulation are common concerns, often exacerbated by long periods of sitting. While it seems counterintuitive, the solution can be found in a chair, even while enjoying a favorite TV show. The key is activating the « second heart »—the calf muscle pump. Simple, targeted movements like ankle pumps and rotations are incredibly effective at pushing stagnant fluid and blood back up toward the heart, reducing edema and discomfort.
The beauty of these exercises lies in their accessibility. You don’t need special equipment or a dedicated time slot. During a commercial break, you can perform a powerful sequence. Start with ankle pumps: extend one leg and alternate between flexing your foot (toes toward shin) and pointing it. This rhythmic contraction and relaxation of the calf muscle is the most direct way to stimulate circulation in the lower legs. For many older adults, this can also help manage the discomfort associated with arthritis, a condition that affects a significant portion of the population.
Follow the pumps with slow, deliberate ankle rotations. Imagine you are drawing a large circle in the air with your big toe, moving first clockwise, then counter-clockwise. This mobilizes the ankle joint through its full range of motion, which is crucial for maintaining balance and preventing falls. A fun and effective variation is to « write » the alphabet in the air with your foot. This combines multiple planes of motion, waking up the smaller stabilizing muscles around the ankle. It’s a simple, almost playful action with serious physiological benefits, turning passive screen time into an active opportunity for self-care.
Your Quick Circulation Boost: The 2-Minute Commercial Break Routine
- 0:00-0:30 – Ankle Pumps: Sit tall, extend one leg. Flex your foot for 2 seconds, then point for 2 seconds. Do 15 pumps per leg to activate the calf muscle.
- 0:30-1:00 – Clockwise Rotations: Lift your right foot. Draw 10 slow, full circles with your big toe. Switch to the left foot.
- 1:00-1:30 – Counter-Clockwise Rotations: Repeat the circular motion in the opposite direction, 10 circles per foot. Focus on smooth control.
- 1:30-2:00 – Alphabet Writing: Using your big toe as a pen, « write » the letters A through E in the air. This challenges the ankle in multiple directions.
- Advanced Tip: Try the final 30 seconds with your eyes closed to enhance your sense of balance and body awareness (proprioception).
The « Not Real Yoga » Myth: Why Chair Yoga Is Still a Workout?
Perhaps the biggest misconception about chair yoga is that it lacks intensity—that it’s « yoga lite » and not a « real » workout. This perception often comes from a narrow definition of exercise, one that equates effort with sweat, speed, and strain. However, scientific measurement tells a different story. The intensity of an activity can be objectively measured in Metabolic Equivalents (METs), and chair yoga registers as a legitimate form of physical activity.
While it’s true that it’s a low-impact option, it is by no means a zero-effort one. A 2023 study measuring energy costs in adults aged 62-87 found that chair yoga ranges from 2.0 to 2.8 METs, qualifying as light-intensity physical activity, comparable to a slow walk. More active sequences can even push into the moderate intensity zone. The study recorded heart rates averaging between 91 and 115 beats per minute, clearly indicating that the cardiovascular system is being engaged. The workout isn’t in the jumping; it’s in the sustained holds, the controlled movements, and the engagement of stabilizing muscles.
The true measure of a workout is its outcome. Does it produce measurable physical improvements? The evidence is a resounding yes, even in very advanced age groups. It’s not just about feeling better; it’s about getting stronger and more stable.
Case Study: Building Strength and Balance at 88
A compelling 2025 case series study from Wichita State University looked at 16 participants with a median age of 88, all with a history of falls. After participating in a chair yoga program just once a week for eight weeks, the group showed statistically significant improvements in their ability to stand up from a chair, a key indicator of lower body strength and functional independence. This study powerfully demonstrates that chair yoga delivers tangible, measurable physical gains, effectively debunking the myth that it’s not a real workout.
Kitchen Chair or Sofa: Which Seat Is Safe for Your Practice?
Once you embrace chair yoga, the next logical question is: which chair? The answer is critical, as your choice of seat can be the difference between a safe, effective practice and a risky, frustrating one. Not all seats are created equal. The soft, sinking comfort of a sofa or armchair, while inviting for relaxation, is precisely the opposite of what you need for an active practice. Your chair is not just a place to sit; it is your foundation, your primary piece of yoga equipment.
The ideal yoga chair should be stable, firm, and armless. A sturdy kitchen or dining chair is often perfect. Its four solid legs provide a secure base that won’t shift or wobble as you move. The seat should be high enough that your feet can rest flat on the floor with your knees at a roughly 90-degree angle. This alignment is crucial for proper circulation and for creating a stable base from which to lift and lengthen your spine. A chair that is too low forces your hips below your knees, causing your lower back to round and making it difficult to engage your core.
The backrest should be firm and upright, offering support when needed but not encouraging you to slouch. Armrests can be a major impediment, restricting your range of motion for twists and side-bends. Finally, the seat should be shallow enough to allow you to sit at the edge, which is necessary for many poses like forward folds. A deep sofa seat forces your sacrum back and inhibits the natural curves of your spine. Choosing the right chair is the first and most important step in setting up a safe and effective practice space.
Your 5-Point Safety Check for the Perfect Yoga Chair
- Check for Stability: Does the chair have four strong, non-wheeled legs? Push on it. Does it wobble or feel top-heavy? Choose a chair that feels completely grounded.
- Assess the Seat Height: Sit down. Are your feet flat on the floor with your knees at a 90-degree angle? If your knees are higher than your hips, the chair is too low. If your feet dangle, it’s too high.
- Evaluate the Back Support: Is the backrest firm and relatively upright? Avoid chairs that are deeply reclined or have soft, pillow-like backs that encourage slouching.
- Consider the Arms: Are there armrests? If so, do they get in the way of you moving your arms out to the side or twisting your torso? An armless chair is ideal for maximum freedom of movement.
- Measure the Seat Depth: Can you sit on the front edge of the chair with your spine tall? If the seat is so deep that you have to slouch to use the backrest, it will restrict your movements.
The 5-Minute Bed Routine to Unglue Stiff Hips Before Rising
The principles of mindful movement aren’t confined to a chair; they can begin the moment you wake up. For many, the first steps of the day are marked by stiff, « glued-up » hips and a creaky lower back. Instead of forcing your body from prone to standing, you can use a simple 5-minute routine to gently awaken your joints and nervous system, making the transition to your day smoother and safer.
This is a neurological wake-up sequence. It begins with small, gentle movements at the periphery—wiggling fingers and toes, circling ankles and wrists. This sends the first signals to your brain that it’s time to start moving, gently activating the nervous system. From there, you can progress to larger movements designed to warm the synovial fluid in your joints. This lubricant thickens overnight, and slow, pumping actions like sliding one heel up the bed toward your buttock are the perfect way to warm it and encourage its redistribution, making movement feel less stiff.
The sequence progresses logically from mobilizing the limbs to mobilizing the hips and spine. Hugging your knees to your chest provides a gentle stretch for the lower back and hip flexors. A slow, supine spinal twist helps decompress the vertebrae. The final, and perhaps most crucial, step is the conscious transition. Instead of jumping out of bed, you roll to your side, pause for a few breaths, then press yourself up to a seated position on the edge of the bed. Pausing here for another few breaths allows your blood pressure to regulate, preventing the dizziness that can lead to an early morning fall. This routine isn’t a workout; it’s a conversation with your body, honoring its need to transition gently into the day.
Blocks and Straps: Essential Tools or Crutches for the Weak?
In the world of yoga, props like blocks and straps are sometimes mistakenly viewed as « cheats » or crutches for those who aren’t flexible or strong enough. This is a profound misunderstanding of their purpose. Props are not a sign of weakness; they are intelligent tools for adaptation and empowerment. They are extensions of your body that bring the floor closer to you, or your limbs closer to each other, allowing you to maintain biomechanical integrity in a pose you might not otherwise be able to access safely.
A strap, for example, is not for yanking yourself into a deeper stretch. It’s for creating a connection. In a seated forward fold, if you can’t reach your feet without rounding your back dangerously, a strap looped around the balls of your feet allows you to keep a long, straight spine while still receiving the benefits of the hamstring stretch. A block placed between the thighs in a seated pose helps you engage your inner thigh muscles, creating stability in the pelvis. These are not crutches; they are teachers, providing feedback and support so you can perform the pose with correct alignment.
Best of all, you don’t need to invest in expensive equipment. Your home is full of effective, DIY props. A bathrobe belt or a long towel makes an excellent strap. A stack of sturdy hardcover books can substitute for a block. A firm cushion or a tightly rolled blanket can provide lumbar support or elevate your hips. As expert Jody Braverman, CPT, RYT, notes, these tools serve a vital purpose. In the GoodRx Health Senior Health Guide, she states:
Using a chair to perform traditional yoga poses can support your body, and protect against falls and injury while you get stronger
– Jody Braverman, CPT, RYT, GoodRx Health Senior Health Guide
The same principle applies to all props. They are there to support you as you build strength and confidence, making the practice accessible, safe, and effective.
Key Takeaways
- Chair yoga is a scientifically-backed practice that improves lung capacity, strength, and balance.
- The right equipment is crucial: a sturdy, armless chair is a tool for safety and proper alignment, not a compromise.
- Props like straps and blocks are not « crutches » but intelligent tools to maintain biomechanical integrity and make poses accessible.
Warrior II with a Wall: How to Build Leg Strength Without Losing Balance?
Warrior II (Virabhadrasana II) is a classic yoga pose renowned for building strength in the legs and core, but for anyone with balance concerns, it can feel intimidating or inaccessible. This is where a wall becomes your most trusted partner. Using a wall for support isn’t a « beginner » modification; it’s a smart strategy that allows you to work on strength and alignment with total confidence, eliminating the fear of falling so you can focus on the work.
The technique involves using vectors of force to create a stable, active pose. By standing a couple of feet from the wall and pressing the palm of your back hand firmly into it, you create a line of energy that engages your arm, shoulder, and core. Simultaneously, you press your front foot down into the floor and your back heel away from you. These opposing forces create a powerful tripod of stability, allowing you to bend deeply into your front knee and build heat and strength in your quadriceps and glutes, all while your balance is fully supported.
Once you feel stable, you can introduce « pulsing warriors »—small, controlled, one-inch bends and straightens of the front knee. This dynamic movement builds muscular endurance and fine motor control. Over time, you can progress by reducing your reliance on the wall, moving from a full palm to just fingertips, and eventually to hovering your hand near the wall as a safety net. This progressive protocol is an incredibly effective way to build real, functional leg strength. Furthermore, research published in April 2023 in the journal Healthcare demonstrated that chair yoga was an effective intervention for women over 65 with knee osteoarthritis, improving fitness and reducing pain, underscoring the therapeutic power of these modified, supported movements.
By embracing the chair and wall not as limitations but as powerful tools, you transform your practice from one of compromise to one of precision, power, and profound self-awareness. You are not doing « lesser » yoga; you are doing smart yoga, tailored to honor your body’s wisdom while building resilience for the years to come.