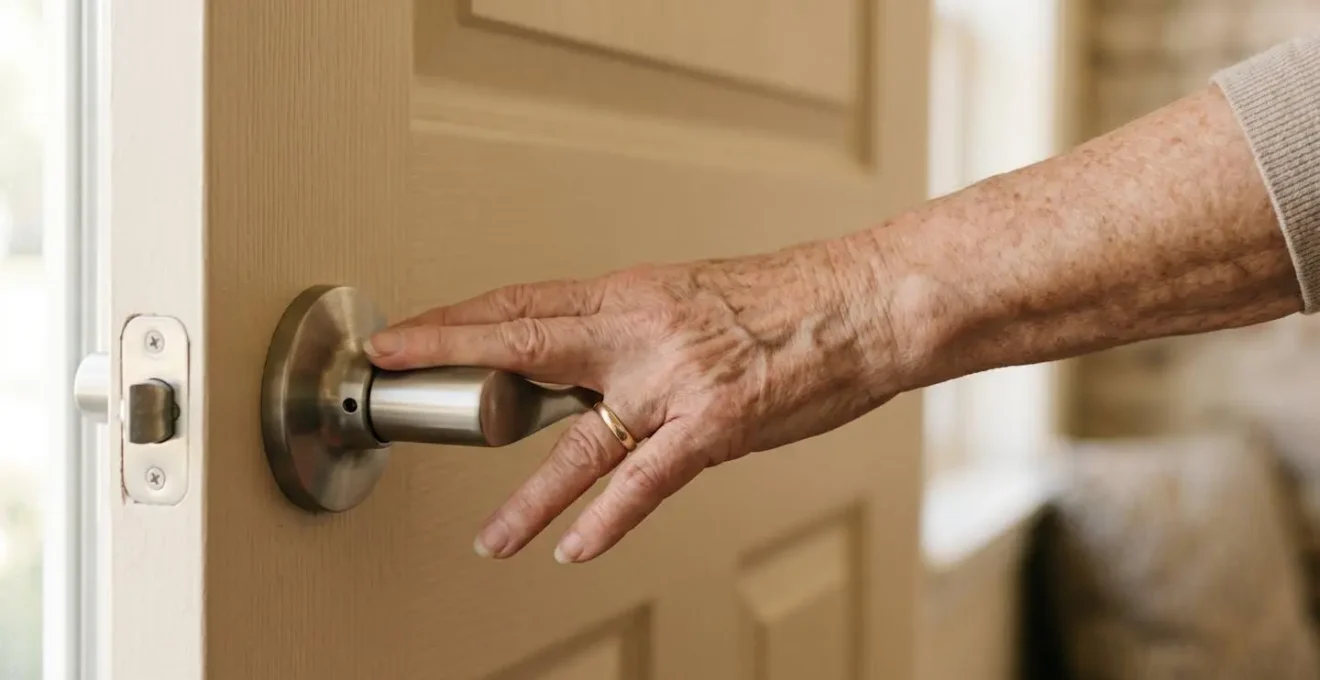
The daily pain of gripping a round doorknob is more than just a nuisance; it’s the starting point of a “fatigue domino” that compromises safety throughout your home. This guide explains that by strategically replacing knobs with levers, you’re not just making doors easier to open. You’re adopting a foundational principle of joint preservation that reduces overall strain, prevents falls in hallways, and allows you to maintain your home’s style without sacrificing accessibility.
That sharp, grinding pain in your thumb joint as you try to turn a stubborn front door knob is a familiar story for many. It’s frustrating, exhausting, and can make you feel like a prisoner in your own home. Many people simply resign themselves to this daily struggle, or perhaps buy a random kitchen gadget, thinking it’s an isolated problem. They might see articles listing dozens of home modifications, feeling overwhelmed and unsure where to even begin.
But what if that single, painful interaction with a doorknob isn’t an isolated event? What if it’s the first domino to fall in a chain reaction of fatigue and risk? The effort you expend just getting through the door drains your energy, making you less steady on your feet as you walk down the hallway. The common advice to “install grab bars” or “remove rugs” is valid, but it misses the root cause that begins at the threshold.
This guide proposes a different perspective. We’ll demonstrate that replacing your round doorknobs is not a minor tweak, but the single most impactful first step you can take. It’s the key to unlocking a broader philosophy of proactive adaptation. We will explore the science behind why a simple push is better than a painful twist, show you how to make these changes yourself without compromising your home’s décor, and connect this one action to a safer, more comfortable life in every room.
This article provides a practical roadmap, starting with the most critical point of entry and expanding outwards to create a truly accessible and comfortable living space. Below is the structure we will follow to guide you through this transformation.
Summary: A Practical Guide to Making Your Home Accessible, Starting with the Door
- Grip vs Push: Why Levers Save Your Thumb Joints from Grinding?
- Can You Retrofit Lever Handles on Old British Doors Yourself?
- Modern or Period Style: How to Adapt Without Ruining Your Decor?
- Casement Latches: How to Make Stiff Windows Easier to Open?
- VAT Relief: Can You Claim Back Tax on Accessibility Handles?
- Does Using a Jar Opener Make Your Hands Weaker or Your Life Easier?
- Trouble Opening Jars: Is It Arthritis or Sarcopenia?
- How to Fall-Proof Your Hallway Without Making It Look Like a Hospital?
Grip vs Push: Why Levers Save Your Thumb Joints from Grinding?
The fundamental problem with a traditional round doorknob is that it forces you into a “pinch grip”—a movement that puts immense pressure on the small, vulnerable joints of your thumb and fingers. For someone with arthritis, this isn’t just uncomfortable; it’s actively damaging. In fact, biomechanical research demonstrates that the load on your joints during a tight grip can be many times the force you are actually applying. This repeated stress accelerates cartilage wear and tear, leading to more pain and inflammation.
A lever handle completely changes this dynamic. It replaces the painful pinch-and-twist motion with a simple push or pull. You can use the palm of your hand, your elbow, or even your hip to open the door, effectively bypassing the small finger joints altogether. This aligns perfectly with a core principle of joint protection advocated by occupational therapists. As the Arthritis Foundation’s experts recommend, you should focus on “using your whole arms and upper body to twist a doorknob rather than twisting it with just your wrist.” A lever handle makes this the natural, default way to open any door.
This isn’t just about avoiding pain; it’s about joint preservation. Every time you choose a lever over a knob, you are saving your joints from unnecessary grinding. You are conserving energy and reducing the cumulative strain that leads to long-term damage. This simple switch is a proactive investment in your future mobility and independence, turning a source of daily pain into an effortless interaction.
Can You Retrofit Lever Handles on Old British Doors Yourself?
The thought of replacing hardware on older, character-filled doors can be intimidating, but it is absolutely a manageable DIY project. The key to a successful, stress-free installation lies in careful measurement and preparation before you even buy the new handles. Many older British homes have doors with unique dimensions, so a “one-size-fits-all” approach won’t work.
Before you start shopping, grab a tape measure and a screwdriver. You need to gather a few key measurements to ensure your new lever handle will fit correctly and cover any marks left by the old hardware. This avoids the frustration of having to drill new holes or being left with an unsightly patch. The illustration below shows the critical points to measure on your existing door setup.
As you can see, understanding your door’s specifications is the most important part of the job. Once you have these numbers, you can confidently shop for hardware that is compatible. A lever on backplate style is often a great choice for retrofitting, as the long plate provides more coverage to hide old screw holes or paint marks compared to a smaller “lever on rose” design. Taking the time to do this prep work will turn a potentially difficult task into a satisfying and empowering home improvement.
Your Action Plan: Pre-Purchase Checklist for Retrofitting Lever Handles
- Measure the backset: Check the distance from the door’s edge to the center of the spindle hole.
- Check door thickness: Ensure your chosen handles are suitable for the thickness of your specific interior or exterior doors.
- Measure the backplate: Note the height and width of your current backplate or rose to ensure the new one will cover existing marks.
- Identify the lock type: Determine if you have a tubular latch or a more complex mortise lock to ensure compatibility.
- Consider coverage: Decide if a lever on a backplate offers better coverage for old marks than a lever on a rose.
Modern or Period Style: How to Adapt Without Ruining Your Decor?
A common and completely valid concern when adapting a home is the fear of losing its character. You want your home to be a reflection of your personality, not a sterile, clinical environment. This is where the concept of “dignified design” comes in. As Universal Design Experts note in their guide, the ultimate goal is to “make a home safer without it looking like a medical facility.” This is especially true when choosing hardware for period properties.
Fortunately, you don’t have to choose between accessibility and aesthetics. Manufacturers now offer a vast range of lever handles in styles that complement everything from a Victorian terrace to a mid-century bungalow. You can find beautiful, ergonomic levers in finishes like antique brass, matte black, or polished chrome that enhance your décor while being kind to your joints. The trick is to see the handle not just as a functional object, but as a piece of “door jewellery” that adds to the overall design.
This approach allows you to seamlessly integrate accessibility into your home’s existing style, preserving its charm and value. A well-chosen lever handle can be just as elegant as a classic knob, but infinitely more comfortable to use.
Case Study: Balancing Heritage and Helpfulness
An analysis of accessible hardware for period properties highlights a key insight: many original antique lever styles were designed for ease of use. Installing high-quality, antique-style accessible handles can actually increase the appeal of a vintage property while preserving its character. However, there’s a catch: original 1930s hardware, while authentic, may not meet today’s accessibility standards. Small, fiddly knobs from that era can be particularly difficult for those with grip issues. The solution is to choose a modern reproduction that combines period aesthetics with contemporary ergonomic design, giving you the best of both worlds.
Casement Latches: How to Make Stiff Windows Easier to Open?
Once you’ve experienced the freedom of lever handles on your doors, you’ll start noticing other pinch-and-twist culprits around the house. One of the most common offenders is the casement window latch. The same biomechanical principles apply: a small, stiff latch requires a tight grip and wrist rotation that can be a nightmare for arthritic hands. Applying the “lever logic” here can make a world of difference in letting fresh air into your home.
The solutions for windows exist on a spectrum, from simple, low-cost maintenance to more advanced installations. You don’t necessarily have to jump to the most expensive option. Often, a little bit of cleaning and lubrication can dramatically reduce the force needed to operate a window. If that’s not enough, upgrading the hardware is the next logical step. Extended levers provide greater mechanical advantage, meaning you have to apply less force to get the same result. For particularly heavy or hard-to-reach windows, a geared operator can be a true game-changer.
Here is a breakdown of the options available, from simple DIY fixes to professional installations:
- Low-cost DIY: Start by thoroughly cleaning and lubricating the window tracks, hinges, and existing latch mechanism to reduce friction.
- Mid-range upgrade: Install extended lever handles or “flipper” style latches that provide a larger surface to push against.
- Advanced solution: Add a geared window operator (a crank system) that multiplies the force you apply, making opening and closing almost effortless.
- Premium option: For ultimate convenience, consider installing automated or electric window openers that operate with the push of a button.
Whichever path you choose, it’s vital to ensure the solution doesn’t compromise safety. The window must remain easily operable in case of an emergency, so always choose quality hardware and follow installation instructions carefully.
VAT Relief: Can You Claim Back Tax on Accessibility Handles?
Making your home more accessible can involve costs, but if you live in the UK, there’s a significant financial relief programme you should be aware of. You may be able to purchase accessibility items like lever handles and other adaptations without paying Value Added Tax (VAT). This isn’t a rebate you claim back later; the VAT is removed at the point of sale, saving you 20% on the spot.
So, who is eligible? The scheme is designed for individuals who are “chronically sick or disabled.” This is generally interpreted to include long-term conditions like severe arthritis that have a substantial and lasting impact on your ability to carry out everyday activities, such as securely opening doors. It’s not for temporary injuries or the frailties of old age, but for a specific, diagnosed long-term condition.
To receive the goods VAT-free, you don’t need a doctor’s note. You simply need to provide your supplier with a signed declaration of eligibility. Most reputable online suppliers of accessibility aids will have a simple digital form to complete during checkout. The declaration states your name, address, and the nature of your condition. It is a serious declaration, and you must be certain you meet the criteria as defined by HMRC. The key is that the products are being purchased for your own personal and domestic use.
While the process is straightforward, it’s always wise to consult the official source. The GOV.UK website has a detailed section (Notice 701/7) that explains the rules in full. Always check with your supplier to see if they participate in the scheme before you make a purchase.
Does Using a Jar Opener Make Your Hands Weaker or Your Life Easier?
It’s a common worry: if I start relying on gadgets like jar openers, won’t my hand muscles get weaker? This is a persistent myth that misunderstands the goal of assistive tools. The aim is not to avoid all effort, but to avoid the *damaging* effort that leads to pain and inflammation. Using a tool to open a stubborn jar is not a sign of weakness; it’s a smart strategy for joint preservation.
Think of it this way: struggling with a tight lid puts an intense, short-term strain on your joints. This can cause a flare-up of inflammation that leaves your hands sore and less capable for days. This pain and swelling then prevent you from doing the very things that maintain strength, like gentle exercises or daily tasks. As Occupational Therapy research points out, “using a tool prevents injury and inflammation from daily tasks, which in turn preserves the joint’s capacity to engage in strengthening exercises.” A jar opener breaks this vicious cycle.
By using the right tool, you save your joints from the peak, damaging forces. This leaves them healthy and pain-free enough to engage in therapeutic activities that build and maintain functional strength. There is a whole hierarchy of tools available, from simple rubber grips that increase friction to electric openers that do all the work for you.
Choosing to use a jar opener isn’t giving up; it’s being strategic. It’s about channeling your energy towards what matters—maintaining long-term function and independence—instead of wasting it on a painful and unnecessary struggle with a pickle jar.
Trouble Opening Jars: Is It Arthritis or Sarcopenia?
If you’re finding it increasingly difficult to open jars or turn knobs, it’s easy to assume it must be arthritis. While joint pain is a major culprit, it’s not the only possibility. Another common, age-related condition called sarcopenia—the gradual loss of muscle mass and strength—could be a contributing factor. It’s also very common for the two conditions to coexist, compounding the problem.
Distinguishing between them is important because the solutions are different. Arthritis primarily involves pain, stiffness, and inflammation within the joint itself. The primary strategy here is joint protection: reducing strain, using anti-inflammatory measures, and employing tools to bypass painful movements. Sarcopenia, on the other hand, is a problem of the muscle. The primary strategy is to build and maintain muscle mass through targeted nutrition (especially protein) and resistance exercise. Using a jar opener helps with arthritis, but it won’t reverse sarcopenia.
So how can you tell the difference? The following table breaks down some of the key indicators. If your symptoms align more with the arthritis column, adaptations like lever handles are a primary solution. If the sarcopenia column sounds more familiar, you should focus on strength and nutrition, in consultation with a professional.
This comparison, based on findings from resources like a study on physical therapy for rheumatoid arthritis, can help you identify the likely source of your grip issues.
| Characteristic | Arthritis Indicators | Sarcopenia Indicators |
|---|---|---|
| Primary Symptom | Pain and stiffness in specific joints | Generalized loss of muscle strength and mass |
| Location | Localized to affected joints (hands, knees, hips) | Widespread muscle weakness throughout body |
| Morning Experience | Morning stiffness that improves with movement | Consistent weakness regardless of time of day |
| Inflammation | Visible swelling, warmth, redness in joints | No visible inflammation |
| Age Correlation | Can occur at any age, types vary | Typically accelerates after age 60 |
| Primary Treatment Focus | Joint protection, anti-inflammatory strategies | Protein intake, resistance exercise |
Key Takeaways
- Replacing round doorknobs with lever handles is the most effective first step, as it addresses the “fatigue domino” that increases risk throughout the home.
- The goal of assistive tools is joint preservation, not avoiding all effort; using them prevents inflammation and enables strengthening activities.
- You can adapt your home without sacrificing style by choosing accessible hardware that matches your period or modern décor.
How to Fall-Proof Your Hallway Without Making It Look Like a Hospital?
We’ve come full circle, right back to the entryway of your home. Remember our “fatigue domino”? The struggle with the front door knob doesn’t just end at the door. It leaves you tired and less stable, and the very next space you enter is the hallway—one of the highest-risk areas for falls. Indeed, according to CDC data, adults with arthritis were 2.5 times more likely to suffer a fall injury. By making the door effortless to open, you’ve already taken a giant step towards fall-proofing your hallway.
Now, let’s make the hallway itself a zone of confidence, not a clinical-looking obstacle course. A safe hallway is built on three pillars: lighting, flooring, and support. But this support doesn’t have to mean institutional-looking steel grab bars. Think creatively. A sturdy, stylish console table placed against a wall isn’t just for decoration; it’s a subtle support point. Decorative wainscoting can provide a tactile guide for your hand as you walk.
Modern design offers incredible options. You can now find designer grab bars in finishes like matte black or brushed brass that look like high-end towel rails. The key is to integrate safety features into your décor. Layer your lighting with motion sensors, choose non-slip flooring that is still warm and inviting, and use colour contrast between hardware and walls to help with visual impairment. By combining these elements, you create a corridor that is not only safe but also beautiful and welcoming—a true testament to dignified design.
By starting with the doorknob and thoughtfully applying these principles throughout your home, you are taking back control. You are building an environment that supports your independence and reflects your personal style, one practical, empowering step at a time.